The profitability of your irrigation system does not depend on the choice between drip or sprinklers, but on your ability to master your plumbing’s physics and the costs of breakdowns in Canada.
- A system poorly matched to your water pressure wastes more than a well-calibrated “less efficient” system.
- The cost of a single repair due to winter frost can cancel out years of water savings.
Recommendation: Before buying, perform a complete diagnostic of your pressure, flow rate, and plant types. Real profitability is in the planning, not the equipment.
For any homeowner in Canada who cherishes a dense flowerbed, the question of watering quickly becomes a headache. Between increasingly strict municipal watering restrictions and the desire for a lush garden, the classic debate pits drip irrigation, renowned for its targeted efficiency, against automatic sprinklers, praised for their wide coverage. Their water consumption is often compared down to the liter, touting the merits of one over the other as a miracle solution to climbing water bills.
However, this vision is incomplete. It ignores the invisible forces that dictate the true performance and, above all, the long-term profitability of your installation. The choice of technology is secondary to much more down-to-earth realities: the water pressure available at your outdoor faucet, the nature of your soil, or even the violence of the Canadian frost that can destroy a system in a single winter. Indeed, cities like Quebec report an average residential consumption of 219 liters per day per person in 2024, a figure that highlights the urgency of water management that is smarter than simply choosing a hose.
But what if the key to profitability didn’t lie in the equipment itself, but in a preliminary diagnostic? This article proposes an expert approach: we will deconstruct the myth of the “best system” to give you the tools to build the most *profitable system for you*. We will analyze critical factors often overlooked — from the physics of your plumbing to end-of-season engineering — that make all the difference between a wise investment and a source of continuous expense and frustration.
This guide will walk you through, step by step, from essential pressure calculations to protecting your investment against frost, to allow you to make an informed, economical decision perfectly adapted to the reality of your Canadian garden.
Summary: Choosing a Cost-Effective Irrigation System for Your Flowerbeds
- Do you have enough water pressure to install 5 sprinklers on the same zone?
- How to install a micro-irrigation system yourself in a weekend?
- Watering at 5:00 AM or 8:00 PM: which schedule maximizes absorption and minimizes evaporation?
- Signs that indicate a leak in your underground irrigation system (and the bill that comes with it)
- Why you must blow out your irrigation lines with compressed air before the frost?
- The mistake of watering native plants like petunias
- How to install strategic water points so you never have to carry heavy watering cans again?
- How to know if your soil is truly dry deep down before watering unnecessarily?
Do you have enough water pressure to install 5 sprinklers on the same zone?
No, you likely won’t have enough pressure if you don’t perform a preliminary diagnostic. The question isn’t just pressure (force), but also flow rate (quantity). An irrigation system, whether sprinklers or drip, is primarily a hydraulic system. Underestimating it is the leading cause of failure: sprinklers that don’t rotate, zones that aren’t reached, and a waste of water and money.
Residential water pressure in Canada varies, but municipal systems are often powerful. For example, in Quebec, pressure is kept under a certain limit to protect infrastructure, but it remains high. It is therefore crucial to measure your static pressure (expressed in PSI, or pounds per square inch) and your water flow rate (in GPM, or gallons per minute). Most sprinklers require a minimum pressure to operate correctly, often between 25 and 45 PSI, and each head consumes a certain flow. Five sprinklers on the same line can easily exceed the flow your piping can provide, even if the pressure seems adequate.
To perform this hydraulic diagnostic, follow these simple steps:
- Get a pressure gauge: This inexpensive tool (15-30 CAD at Canadian Tire or Home Depot) screws onto an outdoor faucet.
- Measure static pressure: Turn off all faucets in the house, screw on the gauge, and open the outdoor faucet fully. The reading is your static pressure. In Canada, it is often between 50 and 70 PSI. Pressure higher than 85 PSI (588 kPa) can be damaging and requires a regulator.
- Measure the flow rate: Take a 5-gallon bucket (about 19 liters) and time how long it takes to fill from your outdoor faucet. If it takes 1 minute, your flow rate is 5 GPM.
With these two numbers, you can consult the technical sheets for the sprinklers. If a sprinkler requires 2 GPM, you can only operate two simultaneously on one zone if your total flow is 5 GPM, keeping a safety margin. Ignoring this calculation leads to an inefficient system and, paradoxically, overconsumption of water to compensate.
How to install a micro-irrigation system yourself in a weekend?
Yes, it is entirely possible to install a micro-irrigation (drip) system in a weekend, provided you have a clear plan and all the necessary materials. The key to success lies in the planning phase, which must be done before even going to the hardware store. A good DIY system is modular and adapts to the shape of your flowerbeds and the needs of your plants.
The installation takes place in three main phases: the source connection, the main distribution, and the micro-distribution. Here is an overview of the process:
- Head assembly: This is the heart of your system. Connect to your outdoor faucet in this order: a programmable timer, a backflow preventer (essential to avoid contaminating your drinking water), a mesh filter (to prevent debris from clogging the emitters), and a pressure regulator (typically 25 PSI for drip irrigation).
- Deploying the main line: Unroll the 1/2-inch main tubing along your flowerbeds. Leave it in the sun for an hour to soften it. Secure it to the ground with stakes so it stays in place.
- Installing emitters: Punch holes in the main tube using a special tool and insert either emitters directly or connectors for 1/4-inch micro-tubing. The latter allows you to bring water precisely to the base of each plant.
- Testing and adjustment: Turn on the water and check for leaks at the fittings. Ensure each emitter is working and adjust the flow if you opted for adjustable models.
This photo illustrates the simplicity of manual component assembly, even in the clay soil typical of many Canadian regions.

The budget for an installation covering about 50 m² is generally between 165 and 250 CAD, when buying parts separately from retailers like Irrigation Depot or RONA. Starter kits are a good option but may lack flexibility for complex flowerbeds.
Your Action Plan Before Buying Equipment
- Mapping: Draw a scale sketch of your flowerbed, indicating the faucet location and dense plant zones.
- Hydraulic diagnostic: Precisely measure your static pressure (PSI) and flow rate (GPM) as detailed in the previous section.
- Biological inventory: List your plant types (annuals, perennials, natives, shrubs) to determine their distinct water needs.
- Zoning: On your sketch, group plants with similar needs into “hydro-zones.” This will determine if you need separate lines.
- Shopping list: Based on your plan, calculate the length of tubing, the number and type of emitters, and the necessary fittings.
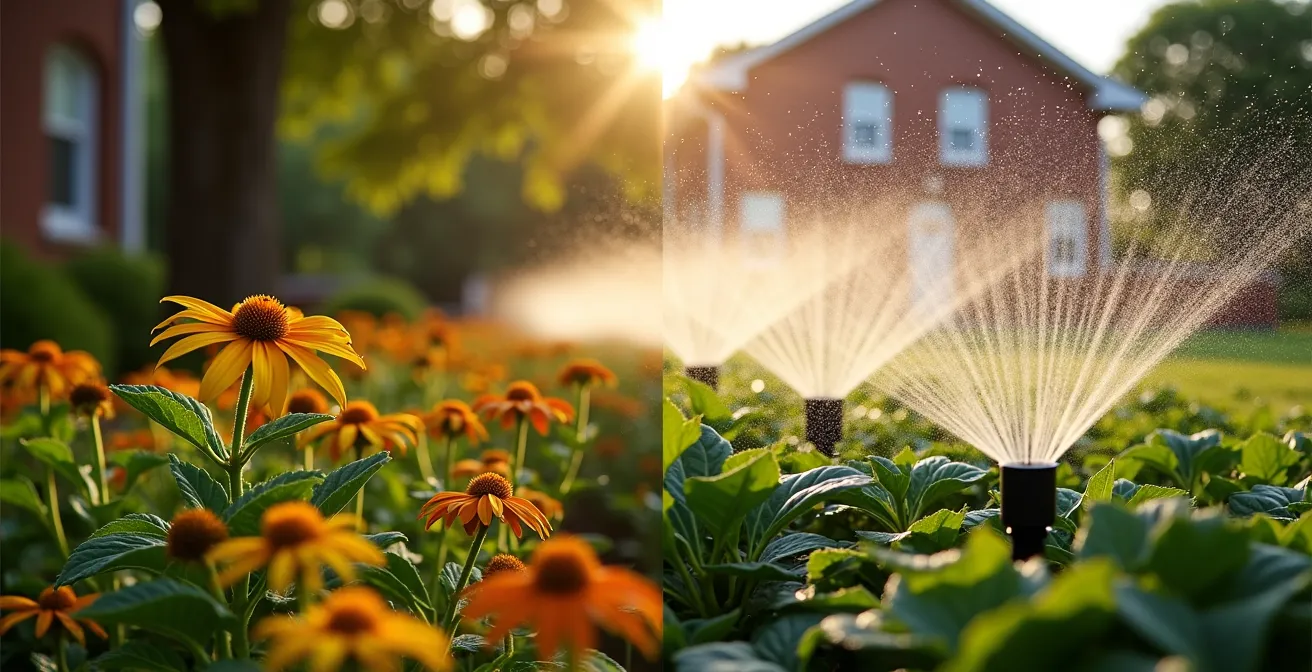
Watering at 5:00 AM or 8:00 PM: which schedule maximizes absorption and minimizes evaporation?
The optimal time for watering is early morning, ideally between 4:00 AM and 7:00 AM. While evening watering might seem like a good alternative, it creates conditions favorable to the development of fungal diseases. The real battle is fought against evaporation and for root absorption.
Watering in the middle of the day, especially under the Canadian summer sun, is a total waste. Solar heat and wind can cause a significant portion of the water to evaporate before it even reaches the ground. According to agencies like EPA WaterSense, up to 30-50% of water can be lost to evaporation, wind, or excessive runoff. It’s a huge waste, both for the environment and your wallet.
Here is why early morning wins hands down:
- Less evaporation: Temperatures are cooler and wind is generally calmer, allowing water to penetrate the soil and reach the roots.
- Better absorption: Plants are in “absorption mode” at the start of the day, preparing for photosynthesis. Water is available when they need it most to face the heat of the day.
- Disease prevention: Foliage has the entire day to dry. Watering in the evening leaves leaves damp overnight, creating an ideal playground for fungi like mildew or black spot.
Using a programmable timer is the simplest and most cost-effective solution to guarantee this morning watering without having to wake up at dawn. It’s a small investment (40-60 CAD for a basic model) that ensures maximum efficiency and substantial water savings in the long term. Evening watering should be reserved for emergencies or extreme heatwaves where a second application is necessary.
Signs that indicate a leak in your underground irrigation system (and the bill that comes with it)
An undetected leak in an irrigation system is a silent financial drain. The first sign is often an unpleasant surprise on your water bill, but physical clues can alert you long before. A small leak may seem harmless, but it can easily waste hundreds of liters per day and cause your consumption to skyrocket.
Water utilities report that even a minor leak can lead to a 25% or more increase in a household’s monthly water bill. For an irrigation system, this figure can be even higher. It is therefore crucial to regularly inspect your system, even if it seems to be working normally. Your installation’s profitability also depends on its maintenance.
Here are the telltale signs of a potential leak in your underground system:
- Abnormally green and lush areas: If a small section of your lawn is much greener than the rest, it’s often a sign that an underground pipe is leaking and watering it constantly.
- Puddles or constantly soggy soil: Muddy areas or puddles that appear long after a watering cycle indicate that water is escaping continuously.
- Mushrooms or algae growth: Constant humidity promotes the growth of mushrooms or a greenish layer on the soil surface near sprinkler heads or along lines.
- “Weeping” sprinkler heads: If water leaks from the lowest sprinkler heads in a zone after the system has shut off, it could indicate a leak in a valve that no longer closes completely.
- Unexplained pressure drop: If your sprinklers suddenly have a shorter range or the jet is less powerful, an upstream leak on the line could be the cause, diverting part of the flow.
- Soil erosion: Small trenches or ground sinkage can form where an underground leak is slowly washing away the earth.
If you suspect a leak, turn off the main supply to the irrigation system and check if your main water meter continues to spin. If it does, the leak is confirmed. Acting quickly to locate and repair it is essential to stop the financial bleeding.
Key Takeaways
- Irrigation system performance depends more on your water pressure/flow than the type of equipment chosen.
- “Hydro-zoning,” which involves watering native plants and annuals differently, is a major savings lever.
- In Canada, the cost of not properly winterizing your system far outweighs a whole season’s water savings.
Why you must blow out your irrigation lines with compressed air before the frost?
In Canada, not “blowing out” or purging your irrigation system before the first frost is not an option; it’s a near-guarantee of costly damage. Water left in pipes, valves, and sprinklers freezes, expands with immense force, and bursts components, turning your investment into an underground debris field. Winterization is the most important insurance policy for your system’s profitability.
Simple gravity drainage is not enough. Pockets of water are inevitably trapped in the low points of the pipes. The only effective method is compressed air purging, which involves blowing all the water out of the system. This is a technical operation that, if poorly executed, can also damage the system. A high-volume but low-pressure compressor must be used. Pressure that is too high (over 60-80 PSI) can itself burst polyethylene pipes.
Here is a comparison of the costs and risks associated with different winterization options in Canada, demonstrating the preventive profitability of this operation.
| Winterization Option | Approximate Cost | Main Risk | Preventive Profitability |
|---|---|---|---|
| Professional Service | 125-250 CAD/year | Minimal | Avoids 300+ CAD in repairs |
| Compressor Rental | 50-75 CAD/day | Possible pressure error | 125-150 CAD/year |
| Compressor Purchase | 300-500 CAD | High initial investment | Profitable after 3 years |
| No Winterization | 0 CAD | Guaranteed breakage | Loss: 300-1000+ CAD |
If you decide to do it yourself, safety and procedure are paramount:
- Turn off the main water supply to the system.
- Set your compressor’s output pressure to 40 to 60 PSI maximum. This is the most critical point.
- Connect the compressor to the line via a specific adapter.
- Activate one zone at a time via your controller, starting with the one furthest from the water source.
- Let the air push the water for about 2 minutes per zone, or until only a cloud of mist comes out of the heads.
- Repeat for each zone, then perform a quick second cycle.
- Once finished, leave the drain valves partially open for the winter.
The mistake of watering native plants like petunias
Watering all the plants in your flowerbed the same way is a beginner’s mistake that costs water and harms the health of your plants. Canadian native plants, like echinacea or black-eyed Susans, have completely different water needs than horticultural annuals like petunias or impatiens. Treating them the same way leads to water waste and can even rot the roots of plants adapted to drought.
The fundamental difference lies in their root systems. Annuals have shallow roots that dry out quickly, requiring frequent watering. Native plants, however, spend their first year developing a deep and robust root system to find water deep in the soil. Once established (after one or two years), they are remarkably drought-resistant. A study on their water needs shows they can survive with 50% less water than traditional annuals. Watering an established echinacea every day is not only useless but counterproductive.
The profitable and ecological solution is precision hydro-zoning. This involves grouping plants with similar water needs and dedicating separate irrigation circuits or emitters with different flow rates to them. This is where the flexibility of drip irrigation becomes a major advantage over sprinklers, which water everything uniformly.
Here is an example of a zoning plan for a mixed flowerbed:
- Zone 1 (High Needs): Annuals like petunias. Use higher flow emitters (e.g., 2 L/h) for almost daily watering in dry weather.
- Zone 2 (Moderate Needs): Non-native perennials (hostas, peonies). Use medium flow emitters (e.g., 1.5 L/h) for watering every 2-3 days.
- Zone 3 (Low Needs): Established native plants. Use low flow emitters (e.g., 1 L/h) for weekly watering, or less, only in cases of prolonged drought.
How to install strategic water points so you never have to carry heavy watering cans again?
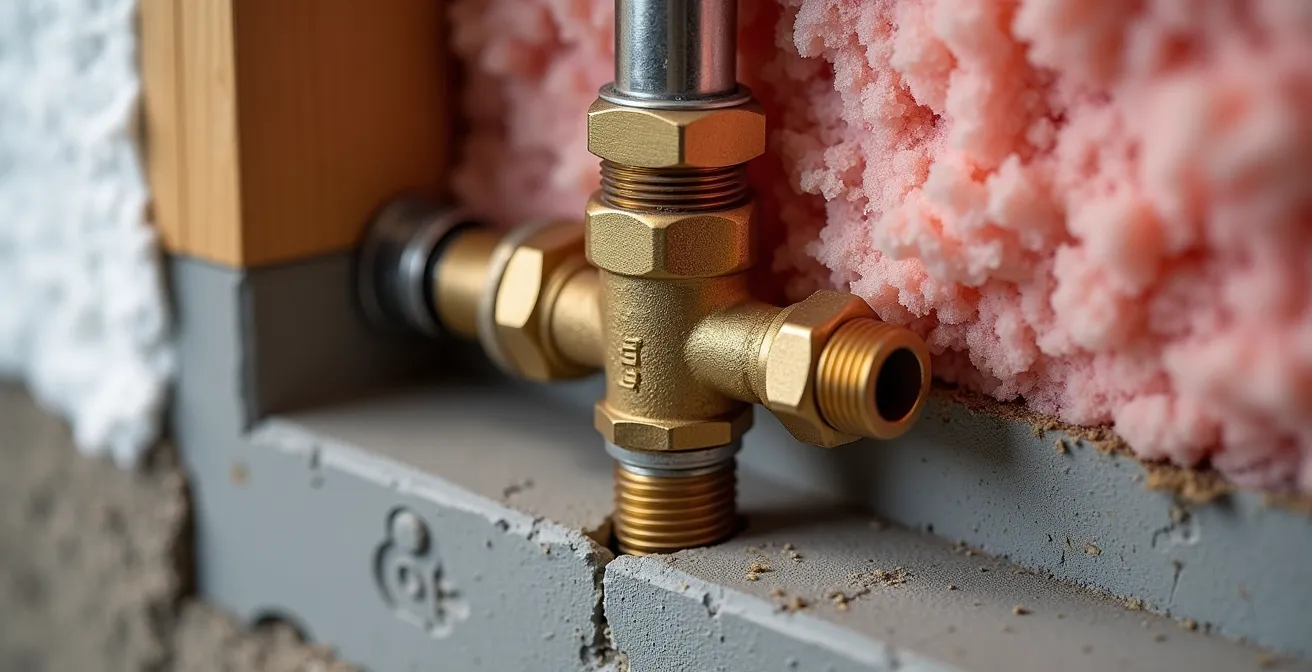
Installing strategic water points, such as additional outdoor faucets, is an investment in comfort and efficiency that radically transforms garden maintenance. It eliminates the need to carry heavy watering cans or drag kilometers of hoses that snag on everything. In Canada, this installation must imperatively be done with frost-proof faucets to avoid winter catastrophes.
A classic outdoor faucet has its valve mechanism right behind the handle, exposed to the cold. A frost-proof faucet (or “frost-proof sillcock”) is designed differently: its stem is much longer, so the valve that shuts off the water is located inside the heated wall of the house. Thus, when you close the faucet, the pipe exposed to the frost empties by gravity, preventing ice formation.
This cross-section clearly shows how the valve is positioned inside the heated space, protecting it from the Canadian frost.
According to renovation experts like RONA, installing these faucets is a systematic recommendation for any new water outlet. Although installation by a certified plumber represents an initial cost (generally between 300 and 500 CAD per faucet), it is a profitable investment. It prevents potentially devastating water damage in walls and foundations, repairs for which would cost thousands of dollars. Adding such a faucet to the back of the garden or near the vegetable patch can be directly connected to your irrigation system, greatly simplifying installation and winterization.
How to know if your soil is truly dry deep down before watering unnecessarily?
Watering “just in case” is one of the main sources of water waste in the garden. The soil surface can appear dry and cracked under the sun, while at a depth of 15 cm, where active roots are located, moisture is still ample. Performing a “deep moisture audit” before each watering cycle is the most effective method to provide only the strictly necessary water.
Forget the simple surface finger test. To know the true state of your soil, you must probe deep. Several methods, from the simplest to the most technological, are available. The choice depends on your budget and the desired level of precision. Unnecessary watering doesn’t just waste a precious resource; it can also “leach” nutrients from the soil, carrying them out of reach of the roots and weakening your plants in the long run.
This table compares the main methods available to the amateur gardener in Canada.
| Method | Cost | Precision | Ease of Use |
|---|---|---|---|
| Manual test (metal rod) | 5-10 CAD | Average | Very Easy |
| Analog tester (e.g., Lee Valley) | 15-25 CAD | Good | Easy |
| Connected sensors (e.g., Ecowitt) | 50-100 CAD | Excellent | Installation required |
| Smart controller (e.g., Rachio) | 200-350 CAD | Excellent | Complex initial setup |
For most homeowners, an analog tester represents the best compromise. Simply push it into the soil to the desired depth for an instant reading. The most economical method remains the simple metal rod (a long screwdriver will do): push it into the soil. If it comes out with moist soil sticking to it, watering can wait. If it comes out clean and dry, it’s time to irrigate.
Ultimately, setting up a cost-effective irrigation system is less a question of technology than methodology. By applying a rigorous diagnostic approach – from water pressure to real soil moisture, including the specific needs of your plants and the imperatives of the Canadian climate – you transform an expense into a smart investment. This global strategy will ensure a lush garden, a controlled water bill, and lasting peace of mind. To put these tips into practice, the next step is to perform a complete hydraulic diagnostic of your property.