Basement humidity is not an inevitability, but the result of poor water management at several levels—a particularly acute problem in Quebec.
- Moving water away from foundations via gutters is the most cost-effective preventive action.
- A positive ground slope (sloping away from the house) is non-negotiable to counter water pressure, especially during snowmelt.
Recommendation: Adopt a strategic vision across three perimeters (roof, surface, basement) rather than simply reacting to leaks for long-lasting protection.
The smell of mold rising from the basement, a dark stain appearing at the bottom of a wall after heavy rain… For many homeowners in Quebec, these signs are a familiar source of anxiety. When faced with a water infiltration, the first reflex is often to think of major and costly repairs like fixing the French drain. We focus on the consequence, forgetting the root cause: deficient water management long before it reaches the foundations.
Cleaning gutters or checking your sump pump are useful tips, but they are only a tiny part of the solution. These reactive actions do not solve the problem at its source. The real key to a dry basement lies not in a single miracle repair, but in a global defense strategy organized into three protection perimeters: the roof, the ground surface, and the underground system. Each perimeter has a specific role in intercepting and diverting water, thereby reducing hydrostatic pressure on your foundations.
This article will guide you through this strategic approach. We will see how simple and inexpensive steps can have a major impact, why landscaping is your most powerful ally (or your worst enemy), and how to diagnose flaws in your drainage system before they cause thousands of dollars in damage. The goal is to empower you to move from a posture of emergency repair to proactive water control around your property.
To effectively navigate through the different layers of protection for your home, here is the action plan we will follow. This guide will lead you from the simplest surface solutions to more complex deep-level diagnostics.
Summary: Your Battle Plan Against Water Infiltration
- Why extending your gutter downspouts to 6 feet from the house is the most profitable (and cheapest) renovation?
- The landscaping error: backfill that settles toward the house after 5 years
- Channel drain or floor drain: how to capture water from a sloping garage entrance?
- Signs that your foundation drain is clogged by iron ochre or roots
- Permeable pavers or plastic cells: which solution lets water through while supporting a car?
- The grading error that floods 40% of basements during spring rains
- The error of modifying the slope that sends water back to your house foundations
- Rain garden: how to turn a drainage problem into ecological landscaping?
Why extending your gutter downspouts to 6 feet from the house is the most profitable (and cheapest) renovation?
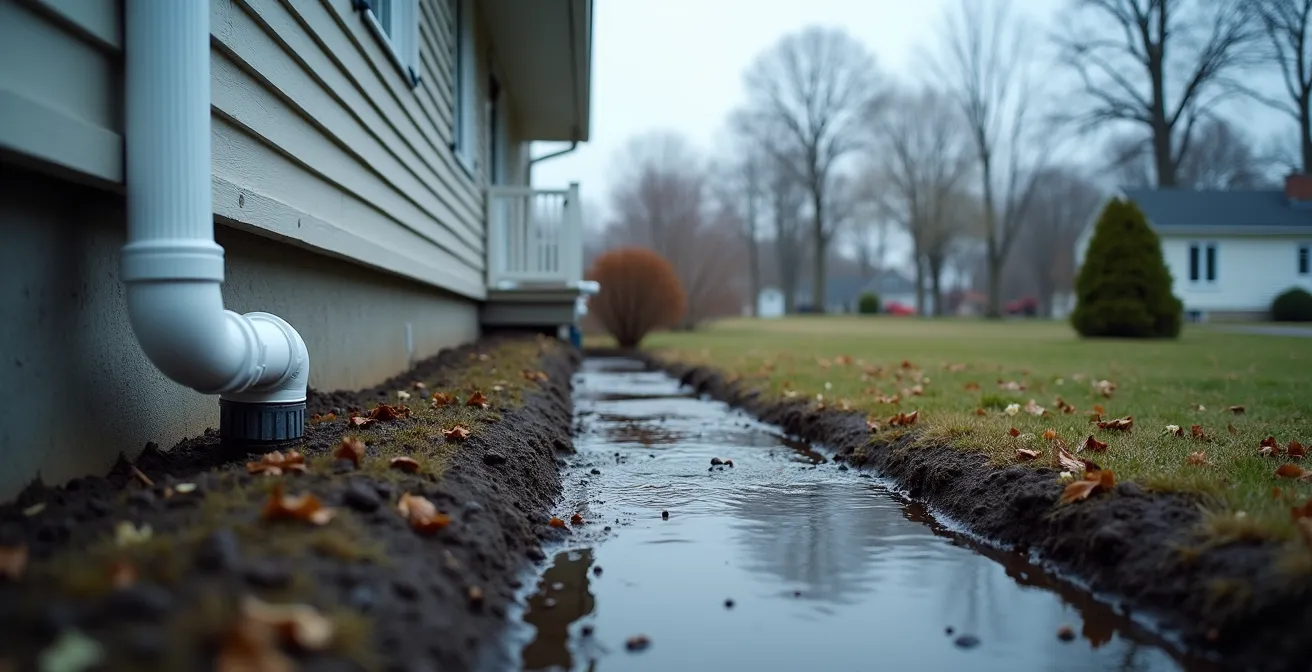
Your house’s first line of defense against water is not underground, but on your roof. Gutters collect hundreds of liters of water, but their work is in vain if this water is discharged directly at the foot of the foundations. This is the most common and damaging mistake. The water then saturates the soil adjacent to the house, drastically increasing hydrostatic pressure on the basement walls and unnecessarily overloading your foundation drain.
The solution is disarmingly simple: install extensions to move the discharge point at least 1.8 meters (6 feet) away from the house. This simple and inexpensive action is, without question, the most profitable investment in foundation protection. Indeed, according to renovation cost data, the cost of a simple $30 extension is negligible compared to the $500 to $1,500 for a simple crack repair, not to mention the $20,000 to $60,000 required for a complete foundation and drain refurbishment.
Installation requires no special expertise. Flexible models, like the Flex-A-Spout, fit most standard downspouts (2×3 or 3×4 inches) and can be stretched up to 140 cm. Simply connect it, direct it away from the house following the slope of the land, and you’re done. For a cleaner look, it is even possible to bury it slightly. It is a preventive gesture that defuses the problem at the source.
The landscaping error: backfill that settles toward the house after 5 years
The second perimeter of protection is your land’s surface. Its configuration, and more precisely its slope, is a determining factor for the health of your basement. Ideally, the ground should have a continuous positive slope, moving away from the house over a distance of several meters. Unfortunately, over time, a frequent error occurs: backfill settlement. The soil used to backfill around the foundations during construction, if poorly compacted, can lose a significant amount of its volume.
This phenomenon is particularly marked in Quebec, where soils are often clayey and subjected to intense freeze-thaw cycles. The backfill can eventually create a “reverse slope” which, instead of moving water away, channels it directly toward the foundations. This is an insidious problem that can appear 5 to 10 years after construction and cancel out the benefits of a perfectly functional French drain.
Case Study: The Impact of Freeze-Thaw on Grading in Canada
The clay soils of the St. Lawrence Valley are extremely sensitive to settlement. As highlighted in an analysis by RenoAssistance on the particularities of French drains in Quebec, poorly compacted backfill subjected to cycles of intense freezing (-30°C) and rapid spring thawing can lose up to 10-15% of its volume in 5 years. This creates a depression along the walls that collects rainwater and snowmelt. To counter this, the National Building Code is clear: it requires a minimum slope of 2% moving away from the house over a distance of at least 3 meters.
Inspecting the slope of your land is therefore an essential step. After rain, observe if water stagnates near the walls. A simple test consists of placing a ball on the ground near the foundation; it should roll away from the house, not toward it. If you notice a reverse slope, correction by adding quality, well-compacted soil is necessary to restore the protection of this second perimeter.
Channel drain or floor drain: how to capture water from a sloping garage entrance?
A particularly critical situation is that of garage driveways that slope down toward the basement door. In this case, even good gutter management and grading are not enough. All the rainwater and snowmelt from the driveway is naturally directed toward the lowest and most vulnerable point of the house. Installing a catchment system right in front of the garage door is not an option; it is an absolute necessity to avoid repeated flooding.
The most common and effective solution is the channel drain (also called a trench drain). This is a channel covered with a grate that intercepts water across the entire width of the entrance and directs it to the storm drainage system. However, in the Quebec climate, a standard channel drain has a major weakness: freezing. Water and snow can freeze inside, creating an ice dam that makes it totally inoperative at the most crucial moment: the spring thaw.
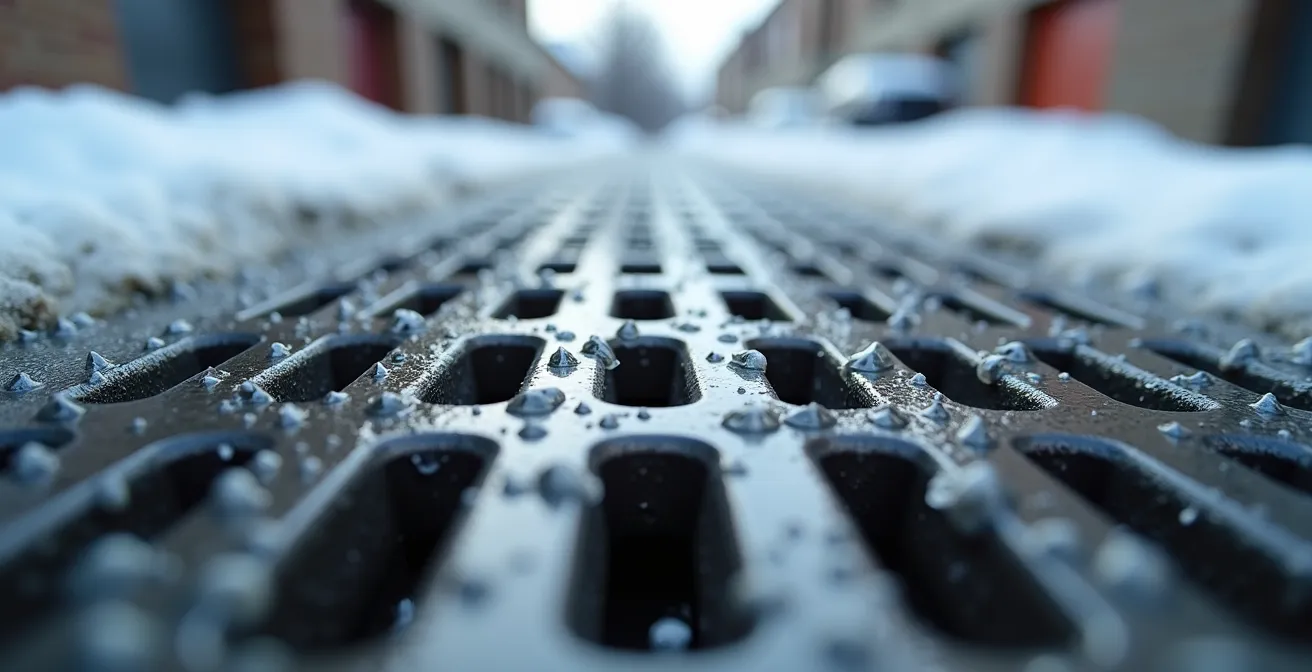
For harsh climates, the option of a channel drain with an integrated heating cable becomes a much more reliable solution. Although more expensive to install, it ensures continuous functionality even in freezing weather, preventing ice formation and guaranteeing the evacuation of meltwater. The following table compares the two options for informed decision-making.
This comparison, based on information from specialists in stormwater drainage systems, highlights the long-term advantages of a system adapted to the Canadian winter.
| Feature | Standard Channel Drain | Heated Cable Channel Drain |
|---|---|---|
| Installation Cost | $500-$1000 /linear m | $800-$1500 /linear m |
| Winter Effectiveness | Risk of freezing and blockage | Functional down to -40°C |
| Annual Maintenance | 2-3 times (spring, fall, winter) | 1 time (fall) |
| Lifespan | 15-20 years | 20-30 years |
| Electricity Consumption | 0 kWh | 15-30W/linear m |
Signs that your foundation drain is clogged by iron ochre or roots
We come to the last line of defense: the foundation drain, or French drain. Its role is to collect water that has managed to cross the first two perimeters and has seeped into the ground down to the level of the foundation footings. In Quebec, its presence has been mandatory on new residences since 1955. However, this system is not infallible, and its lifespan is approximately 25 to 40 years. Over time, it can become clogged, becoming not only ineffective but potentially a source of problems.
Two main culprits are responsible for clogging: tree roots, which infiltrate pipes in search of water, and iron ochre. The latter is a bacterial phenomenon that produces an orange or reddish gelatinous sludge. It develops in the presence of iron, water, and oxygen in the soil—conditions common in many regions of Quebec. This sludge can completely obstruct the drain, backwater valves, and the sump pump.
Identifying a clogged drain before major flooding is crucial. Here are the main warning signs to watch for:
- Presence of orange/reddish deposits near drains, the sump, or on the ground (a clear sign of iron ochre).
- Efflorescence, a white crystalline powder, on concrete basement walls.
- A high and constant humidity level in the basement, even in dry weather.
- Puddles of water that appear recurrently near foundations after rain.
- A persistent smell of mold or damp earth.
- The appearance of new cracks in concrete foundations.
If you observe several of these signs, it is strongly recommended to call a professional. A complete camera inspection, costing between $300 and $600, is the only way to certaintly diagnose the condition of your drain and determine the cause of the blockage (roots, iron ochre, collapse).
Permeable pavers or plastic cells: which solution lets water through while supporting a car?
Rather than simply managing surface water, a more modern approach consists of letting it seep into the ground in a controlled manner, where it does no harm. Traditional impermeable surfaces like asphalt or concrete only concentrate water and accelerate its runoff toward low points. Permeable pavements offer a smart alternative, particularly for parking lots and driveways, by allowing water to pass through the surface and naturally infiltrate into a layer of drainage gravel.
Two main solutions stand out for drivable areas: permeable pavers and vegetated or gravel-filled cells. Permeable pavers look like classic interlocking stone, but their wider joints are filled with small aggregates that let water through. Cells are recycled plastic grids, often in a honeycomb pattern, that are filled with soil and grass or gravel. They create a stable, load-bearing surface while remaining mostly permeable.
The choice between these two options depends on the budget, desired aesthetics, and maintenance constraints, particularly in winter. For a climate like Quebec’s, resistance to freeze-thaw and ease of snow removal are paramount criteria.
| Criterion | Permeable Pavers | Vegetated Cells |
|---|---|---|
| Cost per m² (installed) | $80-$150 CAD | $60-$120 CAD |
| Freeze-thaw resistance | Excellent (flexible joints) | Good (rigid structure) |
| Load capacity | Cars and light trucks | Cars only |
| Winter maintenance | Easy snow removal | Delicate (vegetation) |
| Permeability | 600-800 L/h/m² | 900-1200 L/h/m² |
| Lifespan | 25-30 years | 15-20 years |
Permeable pavers offer better durability and simpler winter maintenance, making them often the preferred choice for main driveways in Canada. Cells, while highly permeable, can be more difficult to plow without damaging the structure or vegetation.
The grading error that floods 40% of basements during spring rains
The most critical period for foundations in Quebec is undoubtedly spring. Spring vulnerability is the result of a formidable combination: surface soil that is often still frozen and therefore impermeable, and a colossal volume of water released by the melting of several months of accumulated snow. If the slope of the land is not adequate, this water has nowhere to go except toward your house.
The importance of a positive slope is tenfold during this period. A slope that is even slightly negative or flat near the house becomes a highway for meltwater, which accumulates against foundations and exerts intense hydrostatic pressure. It is a grading error that has direct and measurable consequences on basement health.
The impact of this phenomenon has been quantified. A study conducted in the Montreal region revealed an alarming statistic: nearly 40% of spring infiltrations were due to insufficient or reverse grading of the land. The same analysis shows that correcting a slope to reach the standard of 2% over 3 meters can reduce the risk of infiltration by 75%. This is proof that surface water management is one of the most powerful levers at your disposal.
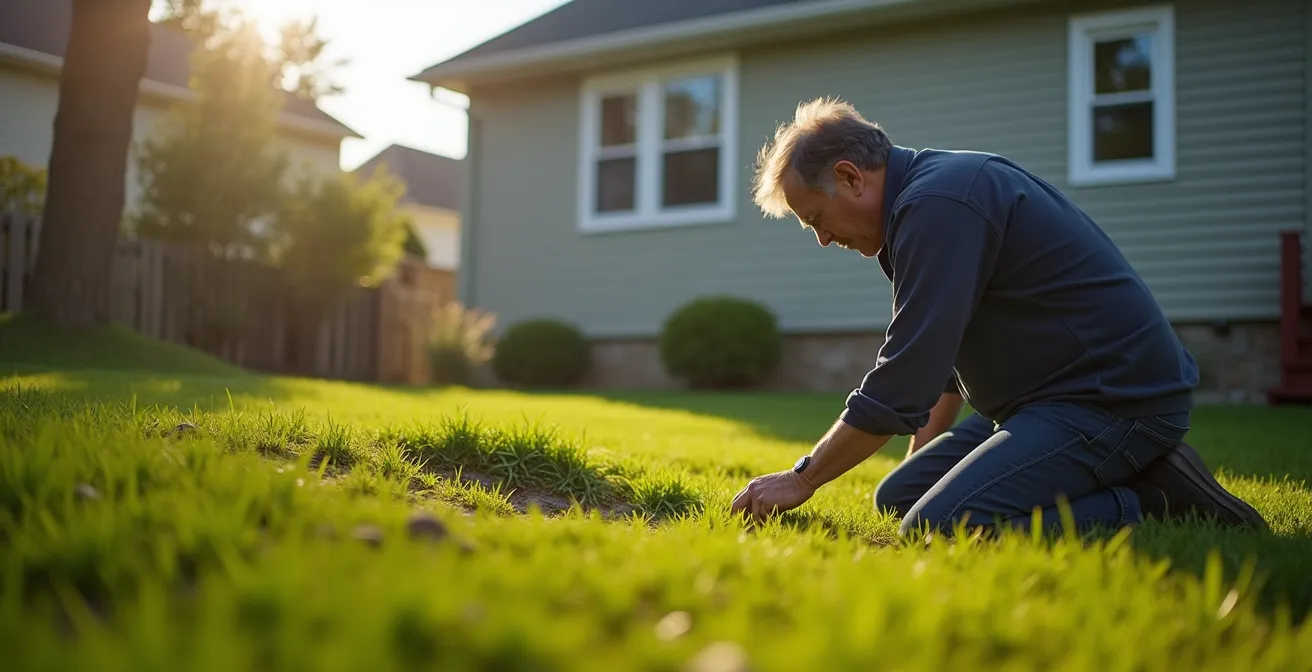
It is therefore imperative to check and, if necessary, correct the grading of your land before spring arrives. This visual audit, achievable by any homeowner, can save you from costly and recurring water damage. Never underestimate the power of melting snow combined with a simple slope error.
The error of modifying the slope that sends water back to your house foundations
During landscaping, such as creating a new flowerbed or installing a terrace, it is easy to make a fundamental mistake: unintentionally modifying the slope of the land. Adding a few centimeters of soil or mulch along the house can be enough to reverse the slope and direct runoff water directly toward the foundations. As the APCHQ (Association of Construction and Housing Professionals of Quebec) reminds us, the guiding principle must always be to maintain an effective negative slope.
It is important to create outdoor landscaping where the slope is negative, meaning it will move runoff water away from the house.
– APCHQ, Association des professionnels de la construction et de l’habitation du Québec
When correcting the slope across the entire surface is impossible or too complex, an elegant and ecological solution consists of creating a landscape swale (also called a “rigole”). This is a wide and shallow depression, often vegetated, designed to intercept, slow down, and redirect runoff water to a place where it can be safely absorbed, such as a rain garden or a dry well.
Creating a swale is an accessible project that can solve stubborn drainage problems while beautifying your land. Rather than suffering from water, you actively guide it.
Action Plan: Creating Your Landscape Swale
- Identify the water path: Observe where water naturally accumulates and flows on your land during rain to define the path of the swale.
- Dig the depression: Excavate a shallow (15-30 cm) and wide trench (flared V-shape) following the identified path.
- Ensure the slope: Check that the bottom of your swale has a slight continuous slope (1-2%) toward the final evacuation point (rain garden, dry well, etc.).
- Finish the bottom: Line the bottom with a geotextile membrane to prevent erosion, then add a layer of drainage gravel to facilitate flow.
- Vegetate the banks: Plant vegetation adapted to wet soils on the sides (such as irises, sedges, or dogwoods) whose roots will help stabilize the soil.
Key Takeaways
- Water management is a 3-perimeter strategy: the roof (gutters), the surface (slope), and the basement (drain).
- A ground slope moving away from the house at 2% over 3 meters is the most effective protection against hydrostatic pressure.
- Prevention is always more cost-effective: a $30 gutter extension can avoid foundation repairs of over $20,000.
Rain garden: how to turn a drainage problem into ecological landscaping?
After intercepting and redirecting the water, the final question is: where to send it? The most sustainable and ecological solution is not to direct it toward the municipal sewer system, which is already overloaded, but to let it return to the groundwater on your own property. The rain garden is a brilliant solution that transforms a water management problem into an aesthetic and environmental asset.
It is a landscape depression strategically placed to receive water from gutters or swales. It is filled with specially amended soil (sand, compost, earth) that promotes rapid infiltration and planted with native vegetation tolerant of variable moisture conditions. In less than 24 to 48 hours, all collected water is absorbed by the soil, filtered by plants, and recharged into the groundwater table.
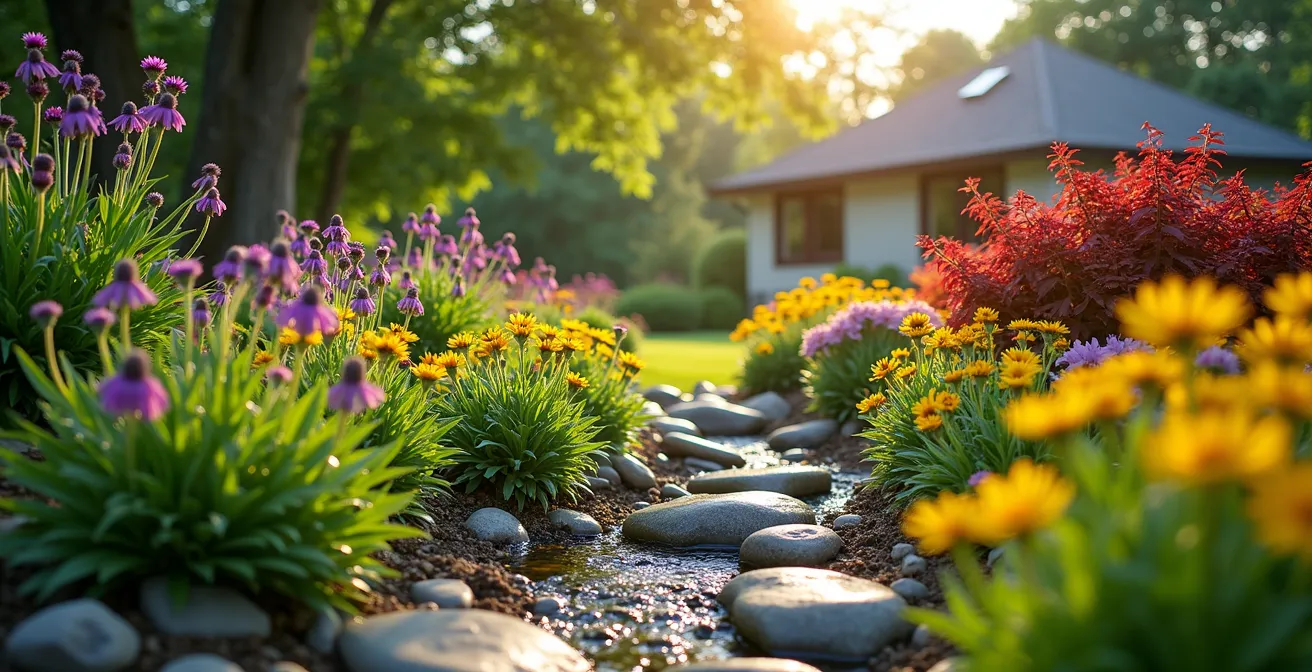
Beyond its drainage function, a rain garden creates a micro-habitat for pollinators and birds, reduces erosion, and decreases the load on public infrastructure. It is the culmination of a smart water management strategy: water is no longer an enemy to be evacuated at all costs, but a precious resource to be integrated into the landscape. Choosing plants is crucial and must be adapted to Canadian hardiness zones to ensure their survival and effectiveness.
- Zone 3-4 (Prairies): Canada Fleabane, Big Bluestem, Black-eyed Susan.
- Zone 4-5 (Quebec/Ontario): Red Osier Dogwood, Blue Flag Iris, Swamp Milkweed.
- Zone 5-6 (Southern Ontario): Cardinal Flower, Spotted Joe-Pye Weed, Sedge.
- Zone 7-8 (West Coast): Salal, Oregon Grape.
By adopting this strategic vision, you transform your relationship with rainwater. The next step is to inspect your property with this new perspective, evaluating successively your first, second, and third lines of defense to identify gaps and plan corrective actions that will guarantee the longevity and health of your home.