The key to a successful fire pit area in Canada lies not in its design, but in its invisible water management engineering and freeze-thaw resistance.
- Drainage is not an option, but the starting point: an active system (channel drain, floor drain) is essential to avoid standing water.
- The choice of materials (permeable pavers, dense concrete) and compliance with regulatory distances dictate the durability and safety of your project.
Recommendation: Always prioritize water management and foundations before thinking about aesthetics. Well-designed drainage is the only guarantee of a functional lounge space year-round.
The dream is universal: a sunken, elegant, and inviting fire pit in the heart of the garden. A lounge space to gather with family or friends under the starry sky. But for many homeowners in Canada, this dream quickly turns into a logistical nightmare. At the first heavy rain or during the spring thaw, the magnificent fire pit becomes a muddy wading pool—a “fire pit” transformed into a “water pit.” Common advice is often limited to “adding a layer of gravel” or choosing beautiful chairs.
However, these surface solutions ignore the reality of our climate. Between freeze-thaw cycles that break apart structures, heavy rains, and strict municipal regulations, creating a durable fire pit area is, above all, a landscape engineering project. The real question isn’t “which design to choose?” but rather “how to build a technical foundation that will allow my design to survive and thrive?” Aesthetics are not the starting point, but the consequence of successful technical planning.
This article adopts an expert approach to drainage and hardscape. We will deconstruct the design myth to reveal that the key to an impeccable fire pit area lies in invisible engineering: active water management, the strategic choice of climate-resistant materials, and scrupulous respect for standards. We will guide you through the technical decisions that will make your fire pit a lasting investment rather than a seasonal disappointment.
To support you in this project, we will cover the essential technical and regulatory points. This structured guide will give you the keys to anticipate every aspect, from the soil to the finishing touches, including safety.
Summary: The technical foundations of a durable lounge fire pit in Canada
- Gravel or pavers: which ground surface won’t get too hot underfoot near the fire?
- How many square feet are needed to comfortably seat 8 people around the fire?
- Wood or concrete: which bench material best resists proximity to heat?
- The positioning error that sends smoke directly to the neighbor’s house
- How to light the path to the fire pit without killing the ambiance of the flames?
- Channel drain or floor drain: how to catch water from a downward-sloping driveway?
- The distance error from the house that voids your home insurance in case of fire
- Professional 12V system vs. solar: why the investment in wiring is worth it for the design?
Gravel or pavers: which ground surface won’t get too hot underfoot near the fire?
The choice of flooring around your fire pit is not just a matter of aesthetics. It has a direct impact on comfort and safety. A material that accumulates too much heat can become unpleasant or even dangerous for bare feet, especially for children. While gravel is a simple solution, it lacks stability and comfort. Interlocking pavers, on the other hand, offer a stable and elegant surface, but their ability to manage heat and water varies greatly.
The superior engineering solution lies in light-colored and, ideally, permeable pavers. Unlike dark surfaces like asphalt or certain dark pavers, light shades reflect more solar radiation. Furthermore, permeable pavers absorb less heat in summer, contributing to a cooler microclimate around the fire pit. Their main advantage, however, remains their ability to manage surface water, a crucial point to prevent your space from turning into a pool.
In Canada, choosing a manufacturer whose products are designed for our climate is fundamental. Freeze-thaw resistance is a non-negotiable criterion. Brands like Techo-Bloc and Permacon are references, but their products have important technical differences.
The following table, based on technical specifications, highlights aspects to consider for a durable investment against Canadian winters. A low water absorption rate is directly linked to better resistance to freeze-thaw cycles.
| Feature | Techo-Bloc | Permacon |
|---|---|---|
| Absorption Rate | Lower (fine aggregates) | Higher (coarse aggregates) |
| Freeze-Thaw Resistance | Optimized for harsh climates | Standard |
| Permeable Options | Slabs and pavers available | Pavers only |
| Warranty | Transferable lifetime warranty | Variable |
In short, opting for a light-colored permeable paver specifically designed for harsh climates is not an expense, but an investment in the comfort and longevity of your landscape.
How many square feet are needed to comfortably seat 8 people around the fire?
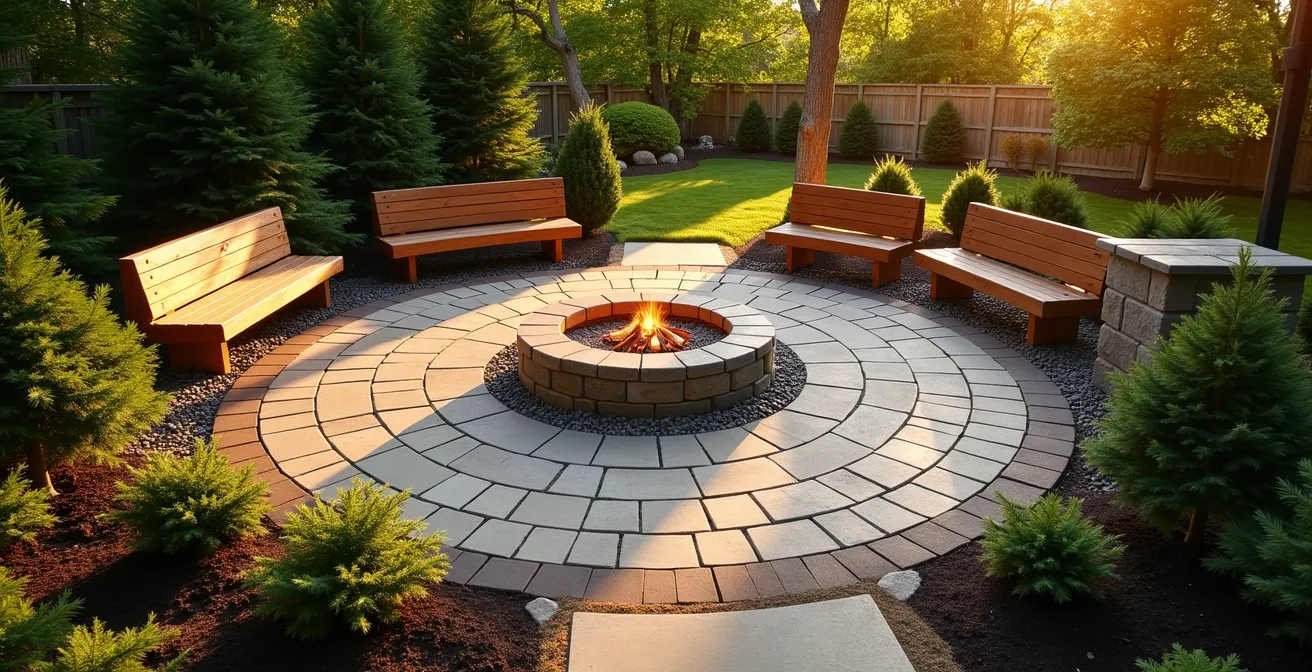
One of the most frequent mistakes in fire pit design is underestimating the space required. A successful layout isn’t just a circle of chairs; it’s a “choreography of space” that must integrate individual comfort, fluid circulation, and safety distances. To comfortably accommodate 8 people, a simple multiplication isn’t enough, especially in Canada where you must anticipate bulky winter coats and the need to move without bumping into others.
The rule of thumb is to allow for a personal space of 30 to 36 inches wide per person seated. For a group of 8, this translates into a seating circle with an inner diameter (the edge of the chairs closest to the fire) of at least 7 to 8 feet, and an outer diameter (the back of the chairs) of 12 to 14 feet. This generous dimension ensures that no one is cramped and that everyone can adjust their distance from the heat.
Beyond the seating circle, it is imperative to provide a circulation zone of at least 3 to 4 feet all around. This space allows people to move without disturbing those seated and constitutes an essential safety margin. Finally, don’t forget to integrate regulatory clearances, which often require a minimum distance from property lines and structures. Space planning must therefore be a synthesis of these three zones: seating, circulation, and safety.
As this top view shows, a well-thought-out layout for 8 people is vast. It anticipates not only the space for sitting but also the space for living and moving around the fire in any season. Thinking in terms of “total square feet” is the key to avoiding a feeling of clutter.
Action Plan: Calculating your space for 8 people in Canada
- Define personal space: Allocate 30-36 inches per seat, taking winter clothing into account.
- Calculate the seating circle: Aim for a total diameter of 12 to 14 feet for chair positioning.
- Integrate clearances: Add the 3 meters (about 10 feet) required by regulations from your property lines.
- Plan for circulation: Ensure a clear passage zone of 3 to 4 feet around all seating.
- Plan for storage: Integrate a safe space for wood storage, close by but at a safe distance from the fire pit.
By neglecting any of these aspects, you risk creating a space that looks magnificent on paper but is uncomfortable and potentially non-compliant in reality.
Wood or concrete: which bench material best resists proximity to heat?
The choice of material for permanent benches or seating around a fire pit is crucial for durability and safety. While wood offers natural warmth and aesthetics, not all species are equal when faced with radiant heat from a fire and the humidity of our climate. Concrete, meanwhile, offers undeniable robustness and modernity, but can be cold and less comfortable.
On the wood side, dense species rich in natural oils like Western Red Cedar or Ipe are excellent choices. Their dense cellular structure makes them more resistant to warping due to heat and humidity cycles. Conversely, softer woods like pressure-treated pine, while economical, will tend to crack, twist, and become rough more quickly under the combined effect of heat and weather.
Concrete, for its part, is non-combustible and extremely durable. A well-sealed architectural concrete bench will fear neither heat, frost, nor humidity. However, its thermal comfort is low: it is cold in the evening and can become very hot if exposed to full sun. A design engineering solution is to create a hybrid structure: a solid concrete or masonry block base that ensures longevity and fire resistance, topped with a noble wood seat (like cedar) that provides comfort and warmth to the touch.

This hybrid approach offers the best of both worlds. It combines the robustness and heat resistance of concrete with the beauty and tactile comfort of wood. The contrast of textures, between the soft cedar grain and the smooth concrete surface, creates a strong visual signature while meeting the technical constraints of proximity to a heat source.
Thus, the best solution is often not a binary choice between wood and concrete, but an intelligent design that leverages the strengths of each material to maximize both durability and comfort.
The positioning error that sends smoke directly to the neighbor’s house
The pleasure of a wood fire can quickly turn into a source of conflict with the neighborhood if smoke management isn’t anticipated. The most common error is positioning the fire pit based solely on the aesthetics of one’s own yard, without considering prevailing winds and proximity to neighboring properties. A poorly placed fire pit can systematically send a cloud of smoke toward a neighbor’s terrace, windows, or air intake, creating a major nuisance.
Before digging, it is imperative to observe the direction of prevailing winds on your property. Place your future fire pit so that smoke is, most of the time, directed toward an uninhabited area of your yard or a neutral zone. Additionally, it is crucial to comply with municipal regulations, which are becoming increasingly strict on this subject. These rules are not there to limit your enjoyment, but to ensure harmonious cohabitation.
Most Canadian municipalities impose a minimum distance between the fire pit and property lines. For example, regulations in Quebec City require a distance of 3 meters from property lines. This setback has a dual purpose: to limit fire spread and to disperse smoke before it directly reaches the neighboring property. The advice of fire prevention experts is unequivocal, as highlighted by Alexandre Lajoie of the Quebec City Fire Protection Service:
The outdoor wood-burning fire pit must be three meters from the neighbor. It must also be cleared by three meters around its perimeter of all structures, constructions, or combustibles.
– Alexandre Lajoie, Quebec City Fire Protection Service
This three-meter clearance rule is an absolute baseline. It applies not only to property lines but also to your own house, sheds, fences, and even trees or shrubs. Ignoring this constraint is not just a risk to neighbor relations; it is a risk to safety and a potential ground for a violation.
Ultimately, good positioning is an act of respect. It ensures that your fire pit remains a source of pleasure for you without becoming a source of annoyance for others.
How to light the path to the fire pit without killing the ambiance of the flames?
Lighting the path to your fire pit is a delicate balance between safety and ambiance. The goal is to guide footsteps safely without creating light pollution that would compete with and weaken the magic of the flames. Light that is too bright, too high, or too cold destroys the intimate atmosphere you’re looking for. The key is to create a subtle, functional, and warm lighting signature.
To achieve this, several landscape lighting design principles must be followed. First, the lighting should be directed downward and kept below knee height. This lights the walking surface without glaring. In-ground spotlights or low bollards are perfect for this use. Second, color temperature is paramount. It is essential to favor warm light, located between 2200K and 2700K. This amber hue close to the glow of a candle or the fire itself creates a soft and harmonious transition.
Another sophisticated technique is using indirect lighting. Weatherproof LED strips, hidden under the risers of a staircase or under the lip of benches, create an elegant floating marker. This method delimits spaces without any visible light source, enhancing the magical aspect of the layout. Finally, integrating home automation, such as motion sensors, allows the lighting to only activate when necessary, preserving the darkness and the fire’s ambiance the rest of the time.
For discrete but effective lighting, here is a list of actions to consider:
- Install in-ground spotlights along the main path, facing downward.
- Favor a warm color temperature between 2200K and 2700K for a cozy atmosphere.
- Keep all light sources below knee height to avoid glare.
- Use waterproof LED strips under benches or steps for subtle, indirect marking.
- Integrate motion sensors so the path only illuminates when someone passes.
Well-thought-out lighting isn’t noticed; it’s felt. It ensures safety while protecting the central element of your installation: the raw and living beauty of the flames.
Channel drain or floor drain: how to catch water from a downward-sloping driveway?
The transformation of your fire pit area into a swimming pool is a symptom of a larger problem: poor runoff management on your property. This issue is particularly critical for layouts located downhill, such as at the bottom of a sloping driveway. In this scenario, water doesn’t just fall from the sky; it rushes down the slope and accumulates exactly where you want to relax. The solution lies not in simple passive drainage (a layer of gravel), but in active water management.
Two professional engineering solutions are available: the channel drain (or linear drain) and the floor drain (or catch basin). – The channel drain is a long, narrow grate installed across the slope, typically at the lowest point of the driveway, just before the start of your fire pit area. It intercepts water across the entire width of the surface and directs it to an underground drainage system. It is the most effective solution for capturing large volumes of runoff. – The floor drain is a smaller square or round grate placed at the lowest point of the area to be drained. It is effective for localized accumulations. In the case of a sunken fire pit, a floor drain can be integrated directly into the bottom of the pit, connected to a “French drain” (perforated pipe in a bed of gravel) that carries water away from the structure.
The most critical period for these systems in Canada is the spring thaw. Frozen ground is impermeable, and rapid snowmelt generates enormous amounts of surface water. Official spring thaw dates, which often extend from March 24 to May 16 depending on the zone in Quebec, show the scale of the challenge. A drainage system must be sized to handle these peak flows.
Case Study: Permeable Paving as an Integrated Drainage Solution
An even more integrated approach is the use of permeable pavers, not just for the surface, but as a drainage system in its own right. As demonstrated by Techo-Bloc’s investment in its Chambly plant, a well-designed permeable paving system can manage considerable volumes of water. The Chambly facility, covering 400,000 square feet, has a retention capacity of 2,672 m³, eliminating the need for traditional retention ponds. This drainage paver solutionshows that it is possible to combine aesthetics and stormwater management on a large scale—a philosophy applicable to your fire pit project.
Your Action Plan for Fail-Safe Drainage
- Evaluate the slope: Identify high and low points and the direction of runoff on your property.
- Choose the active method: Opt for a channel drain to intercept water upstream, or a floor drain to evacuate water at the accumulation point.
- Plan the evacuation: Connect your collection system to a French drain or a storm sewer network to move water away from the area.
- Size for the thaw: Design your system so it can handle peak flows during snowmelt, not just a summer rain.
- Consider permeable pavers: For an integrated solution, explore using drainage pavers for the entire surface, transforming your ground into a water management system.
In conclusion, don’t just endure water: manage it. A proactive approach to drainage is the only guarantee that your investment won’t be literally drowned.
The distance error from the house that voids your home insurance in case of fire
Beyond comfort and design, the positioning of your outdoor fire pit involves your liability and insurance coverage. The most costly error, and potentially the most devastating, is ignoring minimum distance standards from buildings and combustible structures. In the event of a fire, if your installation is deemed non-compliant, your insurer could refuse to indemnify you, turning an accident into a financial catastrophe.
The first, non-negotiable step is to contact your insurer BEFORE starting work. Every insurance policy has its own specific requirements regarding wood-burning fire pits. Failing to declare the addition of a fire pit or failing to respect prescribed standards is a serious fault. As insurance experts remind us, transparency is the key to your protection.
When you own a home with a fire pit or a wood stove, you must absolutely inform your insurer. In all cases, several standards will have to be respected to be insured.
– Partner insurance broker, Soumissions Assurances
These standards are not uniform and vary considerably from one municipality to another in Canada. It is your responsibility to know and apply the bylaws in effect in your locality. A distance deemed safe in Laval may be insufficient in Terrebonne. Furthermore, some large cities like Montreal have simply banned outdoor wood-burning fire pits.
This table illustrates the diversity of regulations in a few Quebec municipalities and highlights the importance of checking local rules. These distances are not suggestions, but legal obligations.
| Municipality | Distance from building | Distance from property line | Additional Requirements |
|---|---|---|---|
| Laval | 3 meters minimum | 3 meters minimum | Spark arrestor mandatory |
| Terrebonne | 4 meters minimum | 3 meters minimum | Max height 1.8m with chimney |
| Repentigny | 4 meters minimum | 1 meter minimum | Use 5 PM – 1 AM only |
| Montreal (Agglomeration) | Prohibited – wood fire pits banned since 2018 | ||
In summary, measuring twice is essential. An inappropriate distance doesn’t just endanger your home, but also your financial security. Compliance is not a constraint; it is your best insurance.
Key Takeaways
- The success of a fire pit area in Canada depends on its drainage engineering, not just its aesthetics.
- The choice of freeze-thaw resistant materials (dense pavers, quality concrete) and respect for safety distances are non-negotiable.
- A professional 12V wired lighting system and active water management (channel drain, floor drain) are investments in durability and year-round functionality.
Professional 12V system vs. solar: why the investment in wiring is worth it for the design?
In the quest for ambient lighting for your fire pit, solar solutions seem attractive: easy to install, eco-friendly, and wireless. However, in the context of a designer and durable landscape in Canada, this option quickly reveals its limits. The reliability of a lighting system is a pillar of design, and on this point, the investment in a professional 12V wired system is vastly superior.
The main flaw of solar is its dependence on weather conditions. Our Canadian climate, with its long winters, short days, and frequent cloud cover, drastically reduces charging efficiency. A solar system that works perfectly in July may be weak, or even inoperable, in November—at the very time when evenings are lengthening and you wish to enjoy your fire pit. The Climate Atlas of Canada confirms this: winter conditions are simply not conducive to reliable solar energy production for consistent lighting.
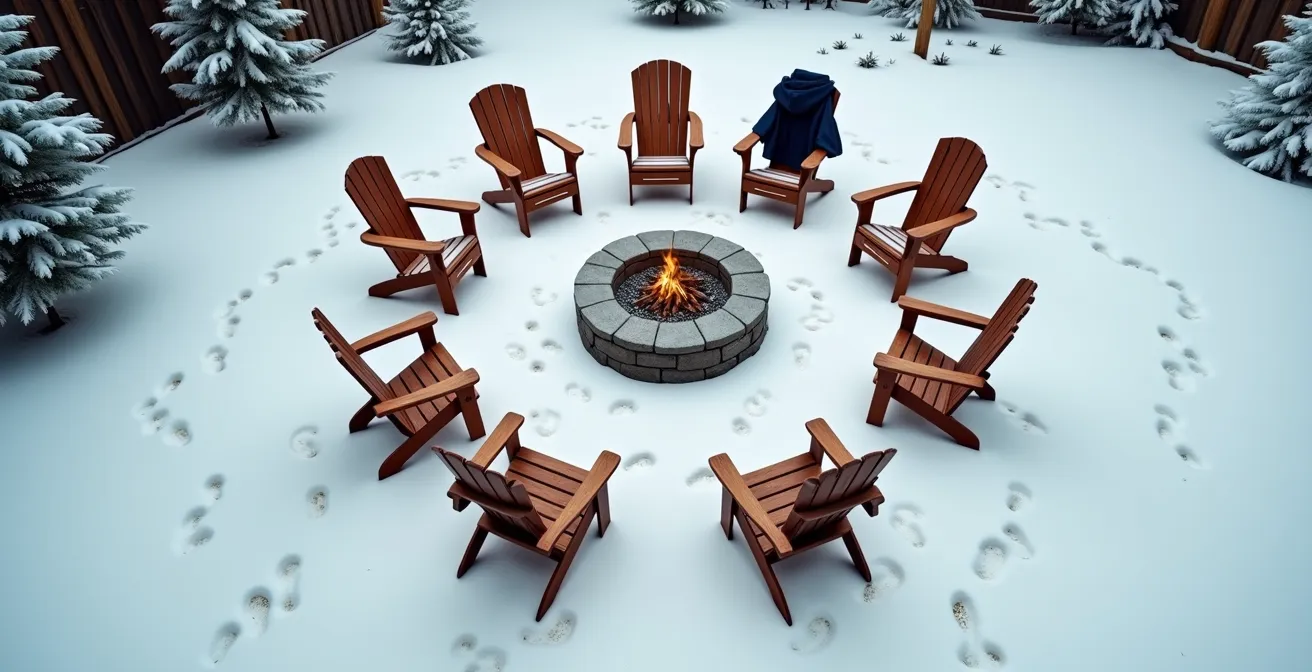
Case Study: The Reality of Solar Performance in Canadian Winter
Data from the Climate Atlas of Canada shows that in many regions, frost persists until May and winter sunshine is limited. This low solar exposure, combined with potential snow cover on panels, makes solar lighting systems unreliable for nearly half the year. For a high-end project intended to be functional year-round, this intermittent performance is unacceptable. A 12V wired system, powered by the home’s electrical grid, guarantees constant performance and a perfect lighting signature, regardless of the season.
Beyond reliability, a 12V system offers unmatched design flexibility. It allows for the creation of a truly scalable infrastructure for your outdoor space. You can:
- Create distinct lighting zones with variable intensities to modulate the atmosphere.
- Install a base for future additions, such as outdoor speakers or a small water feature.
- Connect the whole system to your smart home for centralized control via smartphone.
- Guarantee perfect operation even under a layer of snow.
- Increase the resale value of your property thanks to a permanent and professional installation.
Investing in a 12V wired system is not just about buying lights. It’s investing in the consistency of your design, the reliability of your landscape, and the long-term value of your property.